|
|
Post by xToTheENDx on Aug 11, 2008 22:22:26 GMT -5
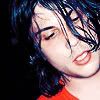
In this tutorial I'm going to be teaching you how to go from This to This.01. Get your base. I will be using this image of the lovely Alicia Way:  02. Create a new layer, fill with #00099a, and set to exclusion, opacity 40. 03. Go to Layer > New Adjustment Layer > Channel Mixer and match your settings to mine:    Your graphic should now look a bit like this:  04. Duplicate your base and drag it to the top. Now, go to Adjust > Hue and Saturation > Hue/Saturation/Lightness and set the master saturation somewhere between 60 and 90, depending on your image. It should look like this:  Set that layer to soft light, opacity 100. Merge all layers.  05. Create a new layer and add any brushes of your choice. I added some by Swimchick.  06. Now go back to your base and crop a small section out of your image. Copy that and paste it as a new layer, then drag it to where you want it on the image and desaturate it.  07. Now just add any final touches you'd like, and you're done! My finished product was this:  Results and comments are welcome. :] |
|
|
|
Post by twistle on Aug 12, 2008 16:07:06 GMT -5
 what do you thinK? |
|
|
|
Post by xToTheENDx on Aug 12, 2008 17:44:37 GMT -5
Loverly. :]
|
|